You can check out our YouTube videos and/or view our step-by-step written instructions below:
DK-93 |
DK-98 |
How to Remove |
DK-95 |
Assembly Instructions
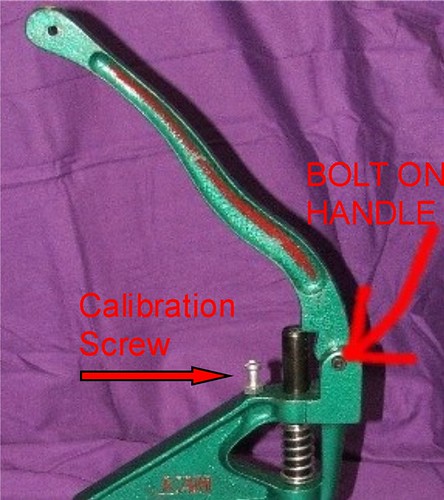
Assembly of your new snap press is very simple; Remove the handle bolt, position the handle as in the picture below, and reinsert the bolt to hold it in place.
Directions
Your die set has 3 pieces - a socket die, a stud die, and a cap die.
Note that often your die sets will ship with a snap already in them. This is for quality control, and easy identification of stud or socket die for the end user. Remove or use these BEFORE attempting to put another stud or socket onto the die
- First insert the cap die, this is the solid metal piece with a shallow round indent in the top. This goes in the hole in the base of the press, and will hold the caps (round with a sharp prong).
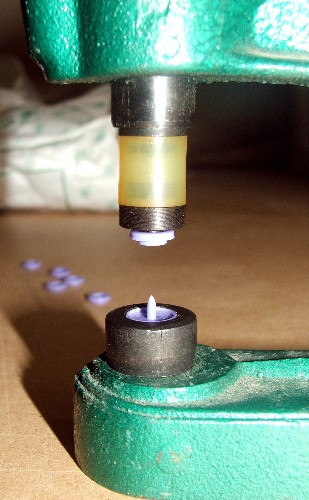
- Next decide whether you are applying the socket side or stud side of your snap first, and select the appropriate die piece. The easiest way to tell the dies apart is to try and see if your snap piece fits snuggly on it (a socket in this picture).
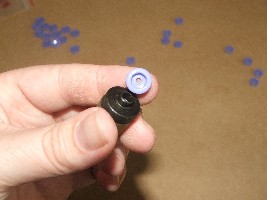
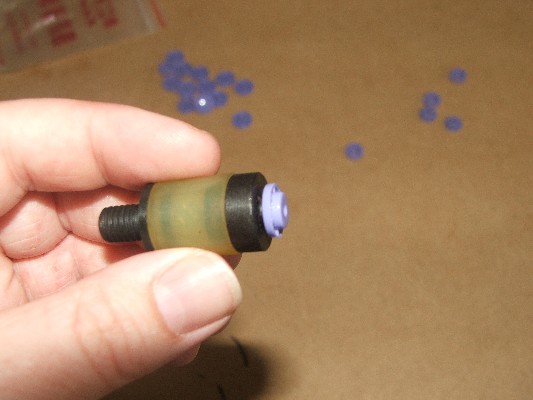
- Snap your socket or stud onto it's die, and screw the die in.
- Take the cap piece and stick the prong into the fabric where you want the snap to be placed. It doesn't need to go right through the fabric, you just need to be able to hold it in place.
- Push the handle down firmly, which brings the top (socket or stud) piece down onto the fabric. You need to push down hard enough that the centre prong of the cap piece is being crushed into the socket or stud snap piece.

- Release the handle and remove your fabric from the press, with its now attached 1/2 snap. Choose the other snap piece (socket or stud) and snap it onto its die piece. Screw this die piece in, and repeat steps 4 & 5.
Congratulations! You now have a completed snap! The two sides should snap together neatly and hold firm. If they don't, you can put it back in the press and try re-pressing the snap, to make sure that you have fully crushed that cap prong into the socket/stud piece.

You need to try a few practice snaps and adjust the calibration screw up and down to increase or restrict the amount the handle can be pressed down. Snaps require a precise amount of pressure to attach them properly; Too much pressure and the snap will prematurely fail and fall off, not enough pressure and the snap parts will not snap together fully. Setting the calibration screw correctly will allow you to confidently press the handle down as far as you can every time, knowing that the snap has been adequately applied and you are not having to guess the correct amount of pressure to apply each individual snap.
A handy hint is to save your microfleece off-cuts and keep them to use as a backing layer in situations where you are wanting to snap through one layer of PUL only. Snapping through a single layer of PUL without a backing piece of fabric, microfleece for example, can result in the fabric ripping around the snap over time, when snaps are repeatedly pulled open. This can lead to the snaps falling out and an inability to re-attach them at the same location.
SIGN UP FOR OUR NEWSLETTER
